Widget Volanta Export phpVMS 7
Exports flights from phpVMS to the CSV format required by Volanta.
 Features
![]() Customisable date selection.
Customisable date selection.
![]() Direct download in CSV format.
Direct download in CSV format.
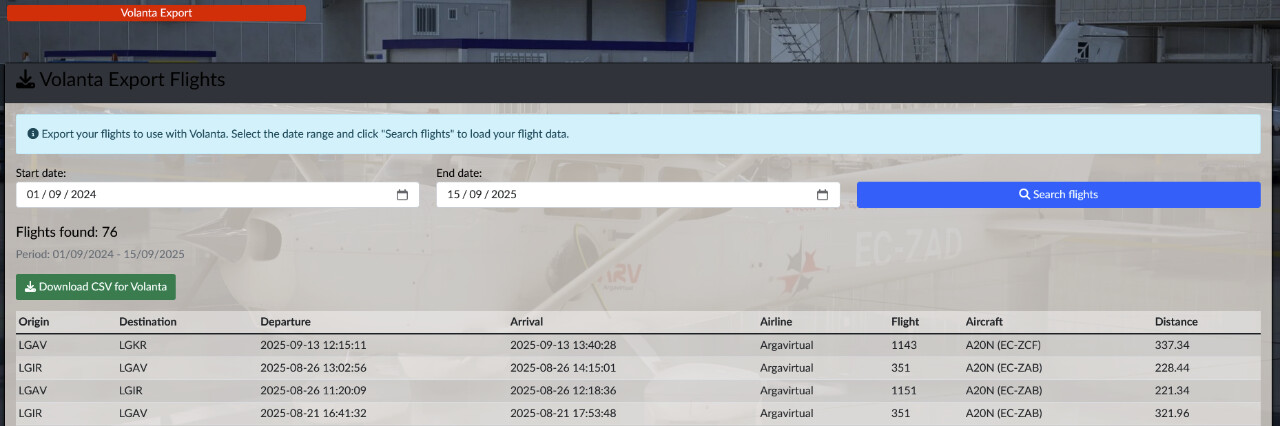
![]() Flight preview in table format.
Flight preview in table format.
![]() Specific format for Volanta.
Specific format for Volanta.
![]() Only visible to the pilot themselves.
Only visible to the pilot themselves.
 Requirements
- phpVMS 7.x
- PHP >=8.1
- Users with registered flights (PIREPs).
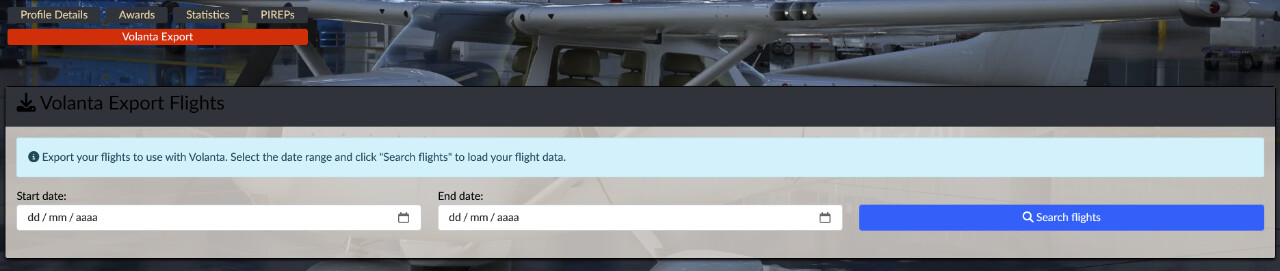
 Screenshots
Installing the Volanta Export Widget
 Manual Installation
Step 1: Copy widget files
Copy these files to your phpVMS installation:
- VolantaExportFlights.php → app/Widgets/VolantaExportFlights.php
- volanta_export_flights.blade.php → resources/views/widgets/volanta_export_flights.blade.php
├── app/
│   └── Widgets/
│       └── VolantaExportFlights.php
└── resources/
    └── views/
        └── widgets/
            └── volanta_export_flights.blade.php
Step 2: Integrate into the Profile view
Add the widget to the file:
resources/views/layouts/your_theme_name/profile/index.blade.php
@widget('VolantaExportFlights')
Wherever you want to display the exporter.
NOTE: Each theme is different and require adjustments to display properly integrated.
Contributions to adapt the widget to different themes are welcome.
_
Here’s an example of how to integrate it into the Disposable theme using Disposable Basic
resources/views/layouts/your_theme_name/profile/index.blade.php
In this block:
{{-- Inline Navigation --}}
      <ul class="nav nav-pills nav-fill mb-2" id="details-tab" role="tablist">
Write this:
        @if($DBasic && $user->flights > 0)
          <li class="nav-item m-1" role="presentation">
            <button class="nav-link p-0 px-1" id="volanta-tab" data-bs-toggle="pill" data-bs-target="#volanta" type="button" role="tab" aria-controls="volanta" aria-selected="false">
              Volanta Export
            </button>
          </li>
        @endif
Below you find this block (the tab content block)
<div class="tab-content mt-2" id="details-tabContent">
Write this in:
    {{-- Widget Volanta Export Flights - Only visible to the user themselves --}}
@if (Auth::check() && $user->id === Auth::user()->id)
    <div class="row mt-5">
        <div class="col-sm-12">
        @widget('VolantaExportFlights')
        </div>
    </div>
@endif
Step 3: Clear cache
In administration panel → maintenance → Clear all caches.
 Verification
Go to your profile (/profile).
You should see the ‘Volanta Export Flights’ widget.
 Uninstallation
Delete the 2 copied files (VolantaExportFlights.php and volanta_export_flights.blade.php).
Remove the lines added to the profile file (resources/views/layouts/your_theme_name/profile/index.blade.php).
Clear cache.
CSV format generated
The CSV includes these columns for Volanta:
Origin, Destination, DepartureTime, Duration, Airline, Callsign, FlightNumber, AircraftType, AircraftRegistration, Route, ArrivalTime, Distance, Fuel
Use
- Go to your profile (/profile).
- Click on Volanta Export button.
- Select dates and click over Search flights.
- Click on Download CSV for Volanta.
- In your Volanta app, Settings → Data Import/Export → Manual → Select CSV.
- Select Data to import, Aircraft and Flights, the selected data will merged in aircraft case, or duplicated in fligths case, so select only flights that you don’t actually have in Volanta.
- Click on Begin Import.